How to Integrate AdminLTE with Laravel (2026 Guide)
AdminLTE is one of the most popular open-source admin dashboard templates, and Laravel remains the leading PHP framework. Combining them used to mean either a community package or a manual setup — but that changed: AdminLTE 4 now has an official Laravel package, colorlibhq/adminlte-laravel, built and maintained by Colorlib, the team behind AdminLTE itself.
The official package goes far beyond styling: it ships 40 Blade components, a config-driven sidebar menu, a scaffolding system that generates 18 complete database-backed app sections, dependency-free roles & permissions (RBAC), auth scaffolding, 9 complete translations, and a Vite-first asset pipeline. Everything runs on Bootstrap 5.3 with vanilla JavaScript — no jQuery.
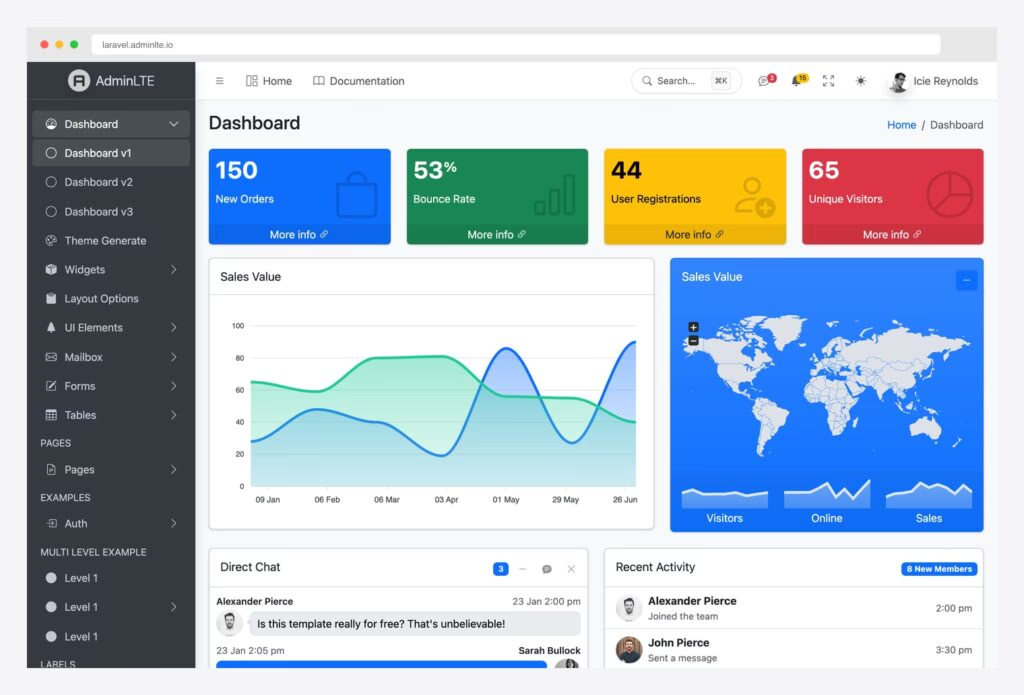
This guide walks you through the official package step by step, and also covers the manual integration route if you want full control. You can explore everything shown here in the live demo at laravel.adminlte.io.

Prerequisites
Before we begin, make sure you have:
- PHP 8.3+
- Composer 2.x
- Laravel 13 (the current release)
- Node.js 18+ and npm (for the Vite asset pipeline)
- A database (MySQL, PostgreSQL, or SQLite)
- Basic familiarity with Laravel’s MVC structure and Blade templating
Step 1: Create a Fresh Laravel Project
Install the Laravel installer globally (if you haven’t already) and create a new project:
composer global require laravel/installer

laravel new admin-panel
Alternatively, create the project directly with Composer:
composer create-project laravel/laravel admin-panelNavigate into your project and verify it runs:
cd admin-panel
php artisan serve
Visit http://localhost:8000 and you should see the Laravel welcome page.
Step 2: Install the Official AdminLTE Package
Two commands get you a fully wired AdminLTE 4 install:
composer require colorlibhq/adminlte-laravel
php artisan adminlte:install
Unlike older AdminLTE packages that copied precompiled assets into public/vendor, this package is Vite-first. The adminlte:install command publishes the config file to config/adminlte.php, drops two Vite entry stubs into resources/js/adminlte.js and resources/css/adminlte.css, and offers to npm install the frontend dependencies pinned to tested versions (admin-lte@^4.0, bootstrap@^5.3, @popperjs/core, bootstrap-icons, apexcharts, and friends).
Add the two entry files to your vite.config.js:
import { defineConfig } from 'vite';
import laravel from 'laravel-vite-plugin';

export default defineConfig({
    plugins: [
        laravel({
            input: [
                'resources/css/adminlte.css',
                'resources/js/adminlte.js',
            ],
            refresh: true,
        }),
    ],
});
Then build the assets:
# Development (with hot reload)
npm run dev

# Production build
npm run build
You can check the state of your installation at any time with:
php artisan adminlte:statusStep 3: Create Your First Admin Page
Every page extends the package’s adminlte::page layout, which gives you the navbar, sidebar, footer, dark-mode toggle, and a ⌘K command palette for free. Create resources/views/admin/dashboard.blade.php:
@extends('adminlte::page')
@section('title', 'Dashboard')
@section('content_header')
<div class="row">
<div class="col-sm-6"><h3 class="mb-0">Dashboard</h3></div>
</div>
@stop
@section('content')
<div class="row g-3">
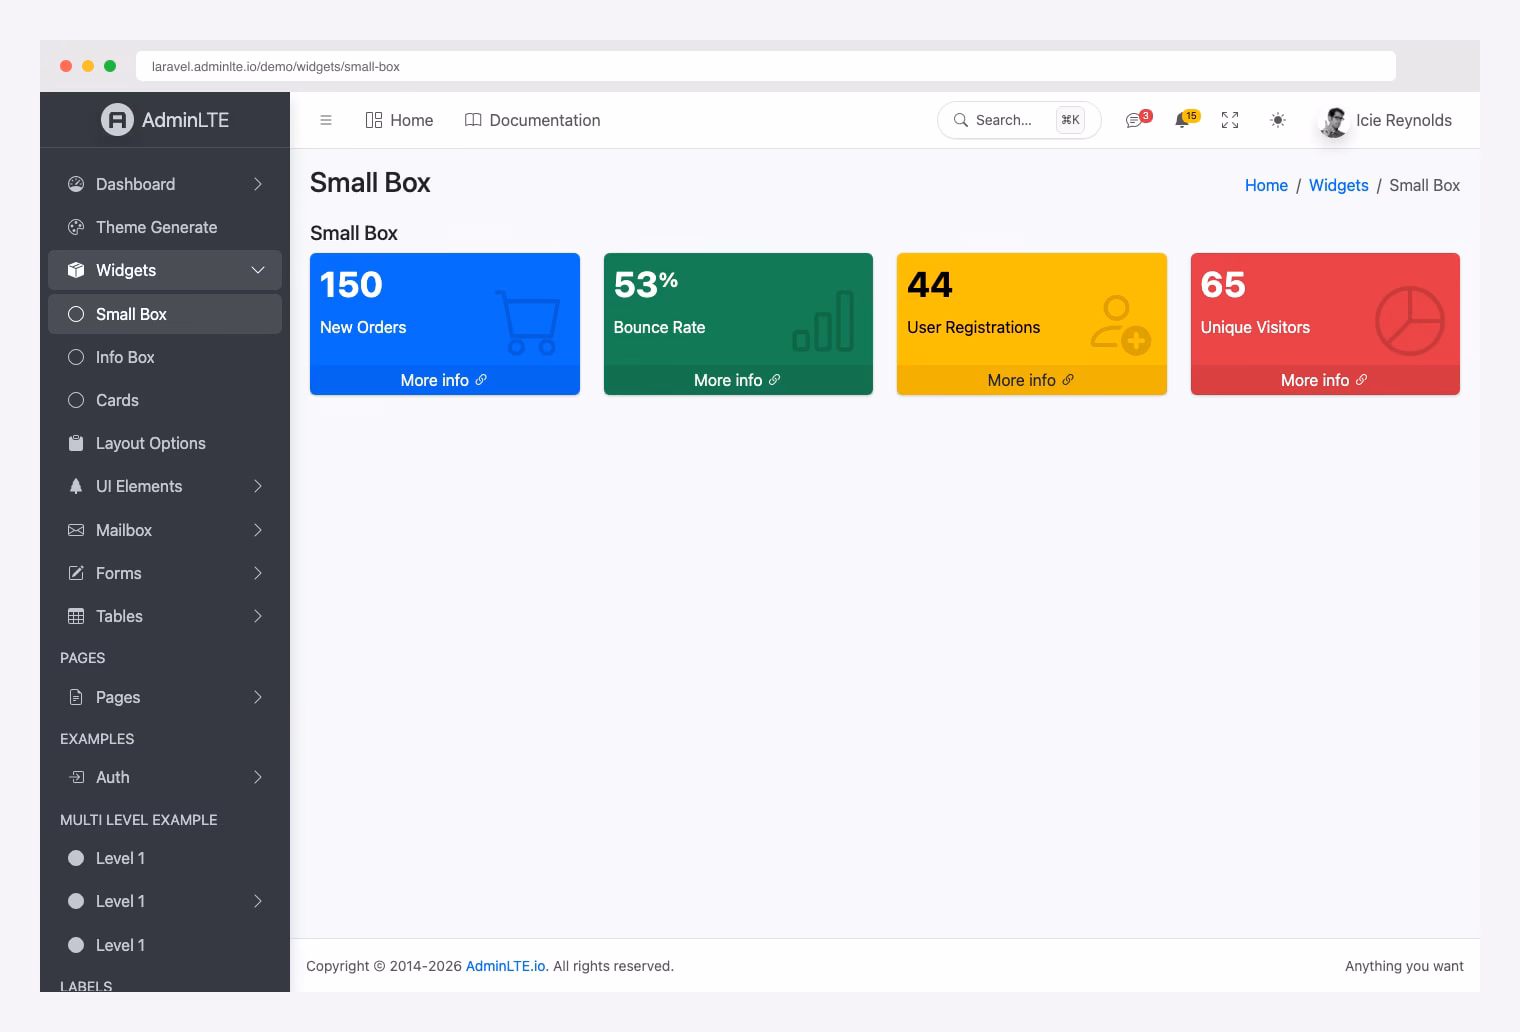
<div class="col-lg-3 col-6">
<x-adminlte-small-box title="150" text="New Orders"
icon="bi bi-cart" theme="primary" url="#" />
</div>
<div class="col-lg-3 col-6">
<x-adminlte-info-box title="44" text="Registrations"
icon="bi bi-person-plus" theme="success" />
</div>
</div>
<x-adminlte-card title="Quick form" icon="bi bi-pencil"
theme="primary" outline collapsible>
<x-adminlte-input name="email" label="Email" type="email"
placeholder="[email protected]" />
<x-adminlte-button type="submit" theme="primary"
icon="bi bi-check-lg" label="Save" />
</x-adminlte-card>
@stopNotice there’s no hand-written widget markup — stat boxes, cards, inputs, and buttons are all Blade components. Add a route in routes/web.php:
Route::get('/dashboard', fn () => view('admin.dashboard'))->name('dashboard');Step 4: Configure the Sidebar Menu
The sidebar is config-driven. Open config/adminlte.php and define your navigation under the menu key:
'menu' => [
    ['header' => 'MAIN'],
    ['text' => 'Dashboard', 'route' => 'dashboard', 'icon' => 'bi bi-speedometer'],
    ['text' => 'Users', 'url' => 'users', 'icon' => 'bi bi-people',
     'can' => 'view-users', 'label' => 5, 'label_color' => 'danger'],
    ['header' => 'CONTENT'],
    [
        'text' => 'Posts',
        'icon' => 'bi bi-file-post',
        'submenu' => [
            ['text' => 'All posts', 'url' => 'posts'],
            ['text' => 'New post', 'url' => 'posts/create'],
        ],
    ],
],
Supported keys include header, text, route, url, icon, label (badges), can (authorization gates), and nested submenu arrays. Active states and permission filtering are resolved automatically by the menu filter pipeline — items a user isn’t allowed to see simply never render. You can also add items at runtime with addAfter() and add() from a service provider.
What’s in the Box: 40 Blade Components
The package registers 40 components under the adminlte- prefix, grouped into three categories:
- Widgets (21) — cards, small boxes, info boxes, alerts, callouts, progress bars, timelines, ratings, direct chat, toasts, tabs, accordions, breadcrumbs, and navbar dropdowns for notifications, messages, and tasks.
- Forms (9) — inputs, selects, textareas, switches, color pickers, file uploads, a Flatpickr date picker, and a Tom Select searchable dropdown. Form components automatically display validation errors from the session and repopulate with
old()input. - Tools (10) — Bootstrap 5 modals, Tabulator data tables, a Quill rich-text editor, ApexCharts charts, jsVectorMap world maps, a FullCalendar event calendar, drag-and-drop kanban boards (SortableJS), and multi-step form wizards.
Heavy JavaScript libraries are lazy-loaded through a plugin system: rendering <x-adminlte-chart> is what triggers ApexCharts to load. Pages that don’t use a chart never ship the library — no configuration required.
Scaffold Complete App Sections in One Command
This is the feature that sets the official package apart. The adminlte:scaffold command generates complete, working application sections — migrations, models, factories, controllers, Form Requests, policies, seeders, feature tests, routes, and data-driven views:
php artisan adminlte:scaffold              # interactive multi-select
php artisan adminlte:scaffold mailbox      # a single section
php artisan adminlte:scaffold --all --seed # everything, with demo data
There are 18 sections to choose from. A few highlights:
| Section | What you get |
|---|---|
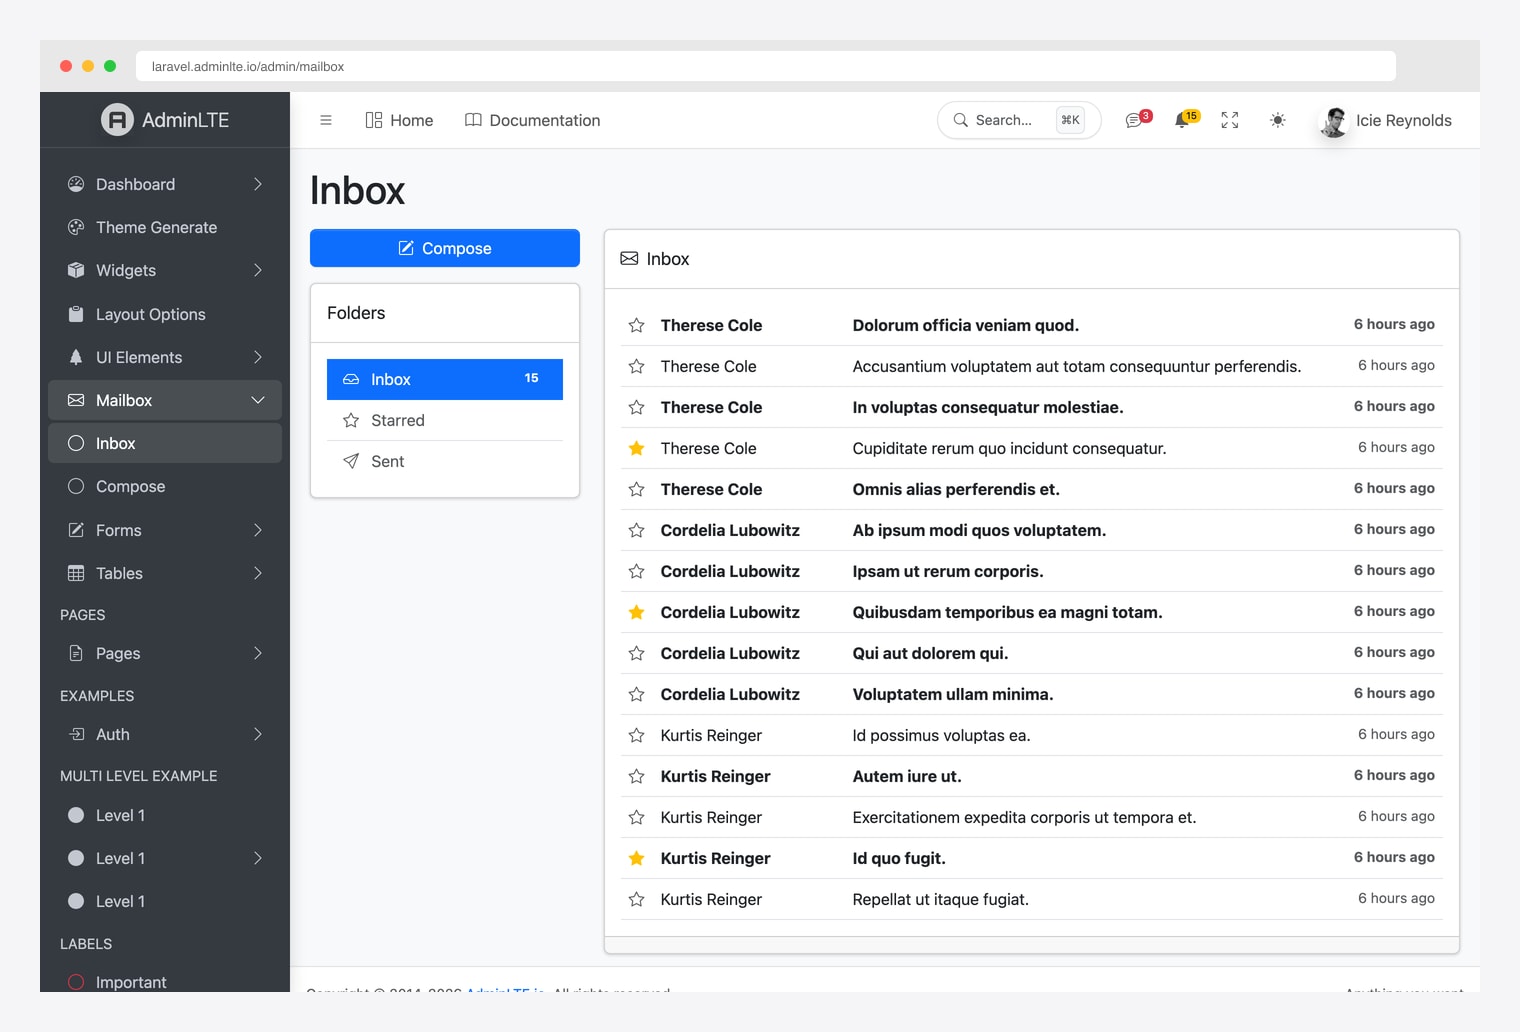
mailbox | Messages table, model, inbox/read/compose UI, seeder |
chat | Conversations + messages with a threaded chat UI |
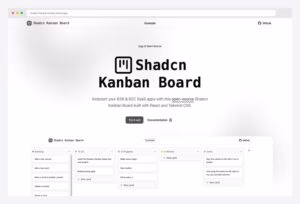
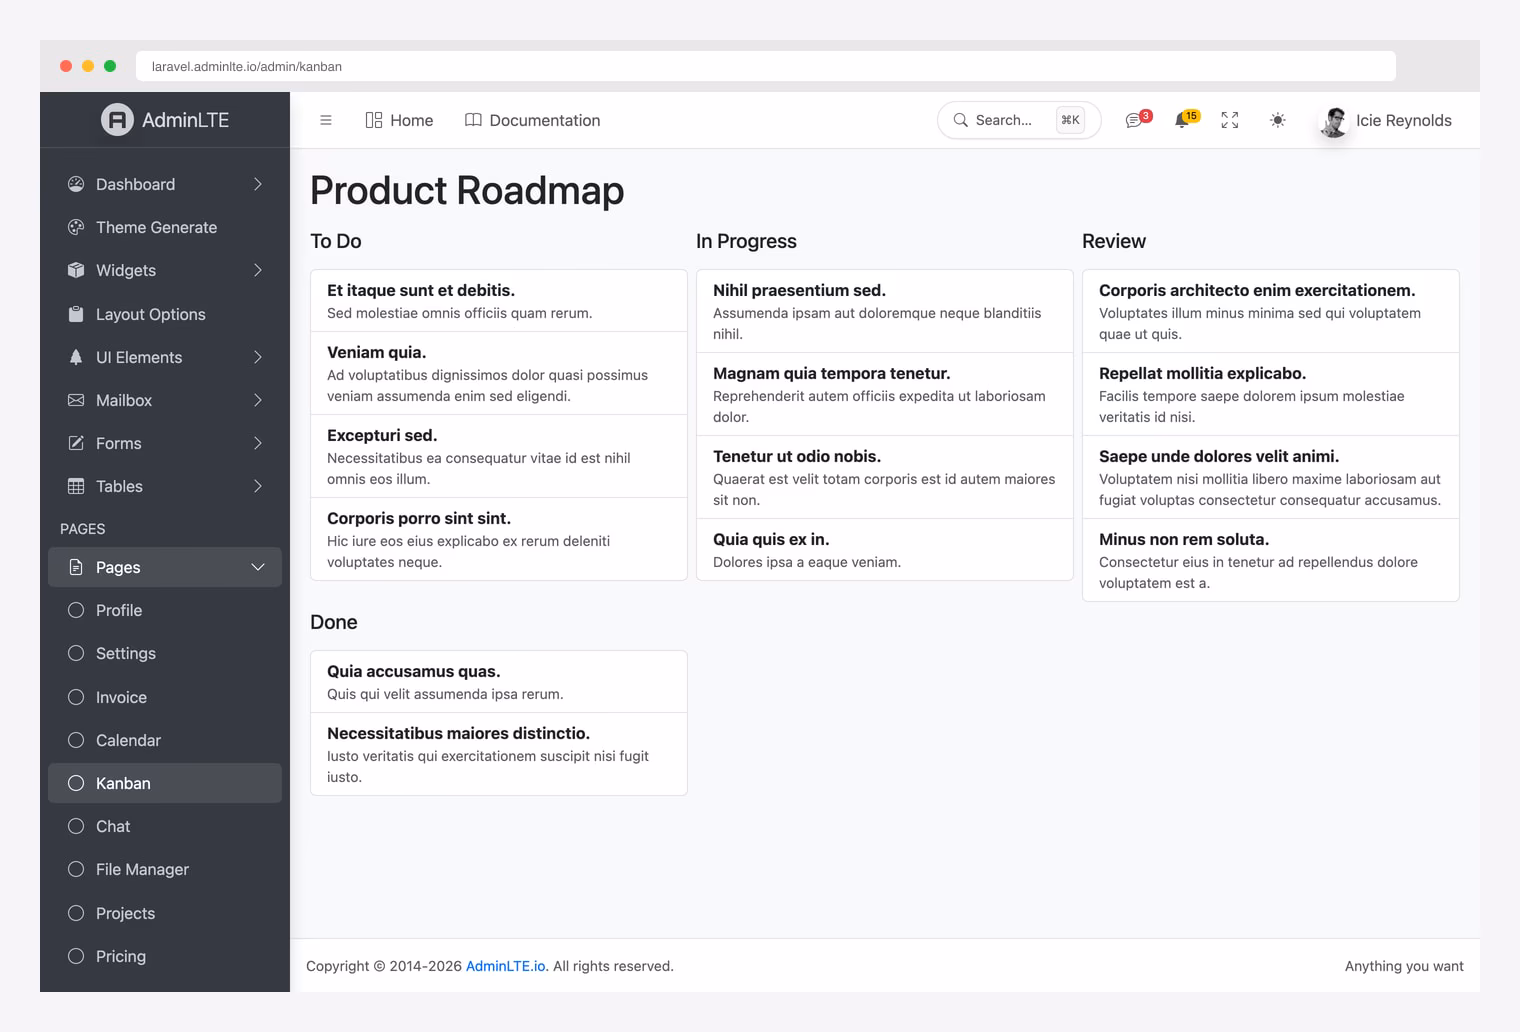
kanban | Boards, lanes, and cards with drag-to-reorder persistence |
calendar | Events table, FullCalendar UI with a JSON feed (full CRUD) |
projects | Projects with status/progress and a CRUD index |
file-manager | Laravel Storage browser with upload/delete |
notifications | Database notifications wired into the navbar bell |
activity-log | Audit log with automatic auth-event logging + user impersonation |
api | Sanctum personal access tokens with a management UI |
rbac | Roles & permissions with a Users/Roles management UI |
The rest: dashboard (data-driven stats), profile, settings, invoice, pricing, faq, impersonation, and realtime (live chat and notifications over Laravel Reverb/Echo). Routes land in an auth-protected /admin group — run php artisan migrate and visit /admin/kanban:
Or /admin/mailbox for a complete database-backed inbox:
Authentication and Authorization
The package ships AdminLTE-styled auth views (login, register, lockscreen, forgot/reset password) and a command that wires them up:
php artisan adminlte:make-auth                 # plain (default)
php artisan adminlte:make-auth --type=breeze   # Laravel Breeze integration
php artisan adminlte:make-auth --type=fortify  # Laravel Fortify integration
The plain type publishes Login / Register / ForgotPassword / ResetPassword controllers with hardening built in: login throttling, email verification, and password confirmation.
For roles and permissions, scaffold the dependency-free RBAC system — no third-party permission package needed:
php artisan adminlte:scaffold rbac
php artisan migrate --seed
You get roles, permissions, a HasRoles trait for your User model, role and permission middleware, a permission-aware Gate (which the sidebar’s can keys respect automatically), and a ready-made Users & Roles management UI.
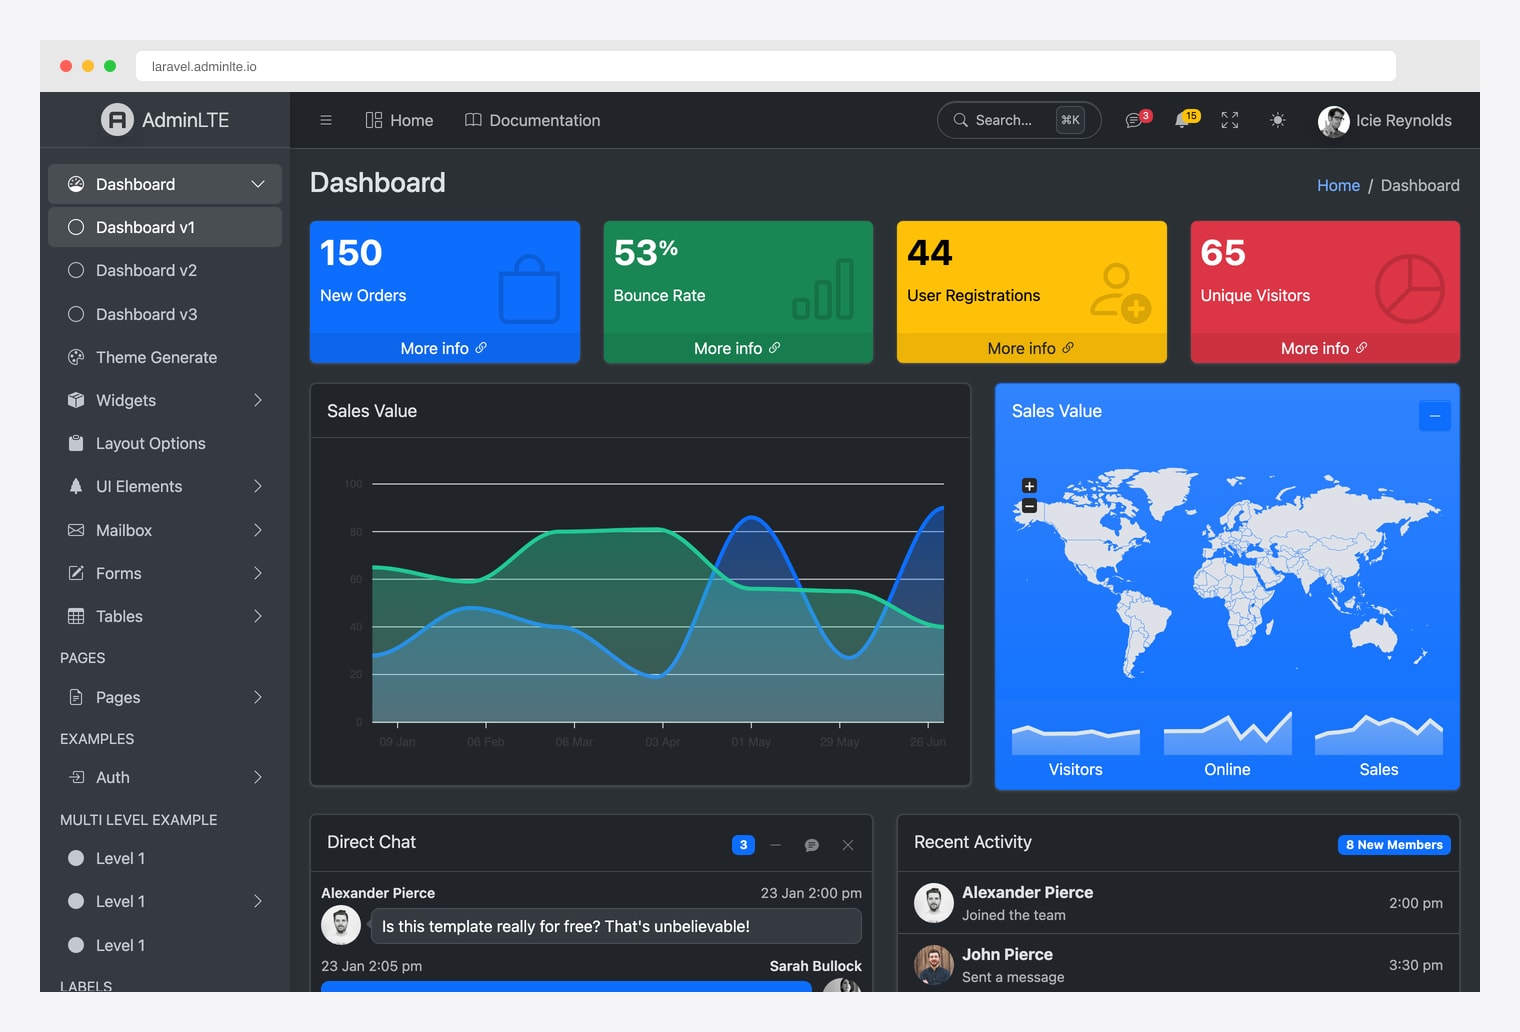
Dark Mode, Theming, and Extras
Dark mode works out of the box via Bootstrap 5’s data-bs-theme — users can toggle it from the navbar and the choice persists:
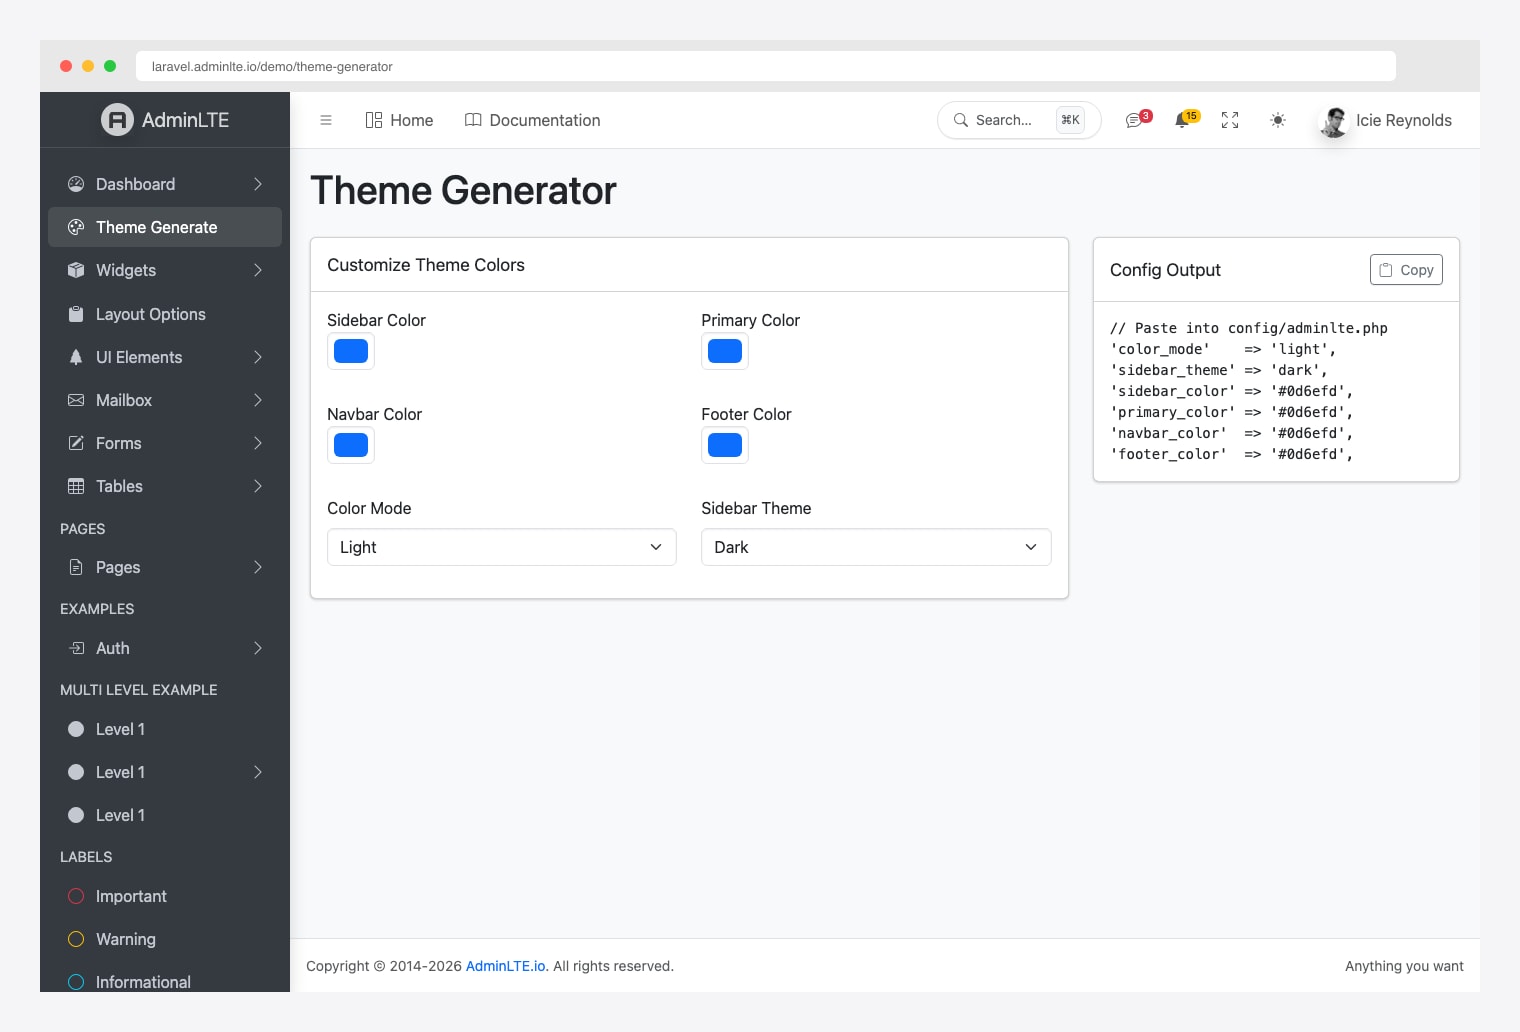
Layout switches (fixed sidebar, fixed navbar, sidebar mini), the logo, the title, and custom element classes are all plain config keys in config/adminlte.php. The bundled demo pages even include a theme generator for experimenting with sidebar and navbar color schemes:
Other niceties worth knowing about:
- ⌘K command palette — searches your sidebar menu; opens with Cmd/Ctrl+K or the navbar search pill.
- 9 complete locales — English, German, Spanish, French, Italian, Japanese, Portuguese, Russian, and Chinese, plus RTL layout support.
- In-app documentation — the full docs are served inside your app at
/docs, rendered with the AdminLTE layout. - Accessibility built in — ARIA-labelled controls, screen-reader-tracked submenu state, and error messages linked to their form fields.
Manual Integration (Without the Package)
Prefer to wire everything yourself? AdminLTE 4 is a plain npm package, so manual integration with Vite is straightforward — you just give up the menu builder, Blade components, and scaffolding.
npm install admin-lte@^4.0 @popperjs/core bootstrap@^5.3Import the styles in resources/css/app.css and the JavaScript in resources/js/app.js:
/* resources/css/app.css */
@import 'admin-lte/dist/css/adminlte.css';

// resources/js/app.js
import 'admin-lte/dist/js/adminlte.js';
Then build a master layout at resources/views/layouts/admin.blade.php using AdminLTE 4’s wrapper classes:
<!DOCTYPE html>
<html lang="{{ str_replace('_', '-', app()->getLocale()) }}">
<head>
    <meta charset="utf-8">
    <meta name="viewport" content="width=device-width, initial-scale=1">
    <title>@yield('title', 'Admin Panel')</title>
    @vite(['resources/css/app.css', 'resources/js/app.js'])
</head>
<body class="layout-fixed sidebar-expand-lg bg-body-tertiary">
    <div class="app-wrapper">
        @include('layouts.partials.navbar')
        @include('layouts.partials.sidebar')

        <main class="app-main">
            <div class="app-content-header">
                <div class="container-fluid">
                    @yield('content_header')
                </div>
            </div>
            <div class="app-content">
                <div class="container-fluid">
                    @yield('content')
                </div>
            </div>
        </main>

        @include('layouts.partials.footer')
    </div>
</body>
</html>
From there you write the navbar and sidebar partials by hand following the AdminLTE 4 documentation. This route makes sense for heavily customized designs; for everything else, the official package gets you further, faster.
AdminLTE 4 vs. AdminLTE 3 (and the Legacy Package)
If you’ve used AdminLTE with Laravel before, you probably used jeroennoten/laravel-adminlte — a great community package, but one that targets AdminLTE 3 (Bootstrap 4 + jQuery). The official colorlibhq/adminlte-laravel package is the AdminLTE 4 successor: Bootstrap 5.3, vanilla JS, Laravel 13, PHP 8.3+, and Vite instead of precompiled assets. The migration-friendly part: the @extends('adminlte::page') layout convention and the config-driven menu array work the same way, so existing views need surprisingly few changes.
What changed in AdminLTE 4 itself:
- Bootstrap 5 — no more jQuery dependency; data attributes use the
data-bs-prefix. - CSS variables — theme customization uses CSS custom properties for runtime changes.
- Dark mode — built-in via Bootstrap 5’s
data-bs-theme="dark". - New layout classes —
.app-wrapper,.app-sidebar,.app-main, and.app-footerreplace the old wrapper names. - Bootstrap Icons — the default icon set changed from Font Awesome to Bootstrap Icons (Font Awesome still works).
Production Tips
- Run
npm run buildto generate optimized, versioned assets with Vite. - Cache everything —
php artisan config:cache,route:cache, andview:cache. - Protect admin routes — the scaffolded
/admingroup is auth-protected out of the box; add the package’sroleorpermissionmiddleware for finer control. - Let plugins stay lazy — optional libraries (Flatpickr, Tom Select, Tabulator, Quill) only load on pages that render the matching component, so don’t bundle them globally.
- Disable the demo pages — set
'demo' => falseinconfig/adminlte.phpbefore going live.
Useful Resources
- colorlibhq/adminlte-laravel on GitHub — source, issues, and full documentation.
- The package on Packagist
- Live demo — every feature in this guide, running on a real Laravel app.
- AdminLTE 4 documentation and the Laravel documentation
- Best Laravel Admin Dashboard Templates — AdminLTE alternatives that work well with Laravel.
- Building Laravel Dashboards — best practices for data-driven dashboards.
- AdminLTE vs CoreUI vs Tabler — how AdminLTE compares to other admin templates.
Not a Laravel shop? AdminLTE 4 also ships official React/Next.js, Vue/Nuxt, and Django editions.
Conclusion
Integrating AdminLTE with Laravel in 2026 comes down to two commands: composer require colorlibhq/adminlte-laravel and php artisan adminlte:install. From there, the official package gives you 40 Blade components, a config-driven sidebar, hardened authentication, dependency-free roles & permissions, and a scaffolding system that can generate a mailbox, kanban board, calendar, or a full RBAC setup in seconds — all on Bootstrap 5.3 and vanilla JavaScript, with no jQuery anywhere.
Start with the live demo to see what you’re getting, then run the install in a fresh Laravel 13 project — you can have a professional, database-backed admin panel running in well under an hour.
You Might Also Like